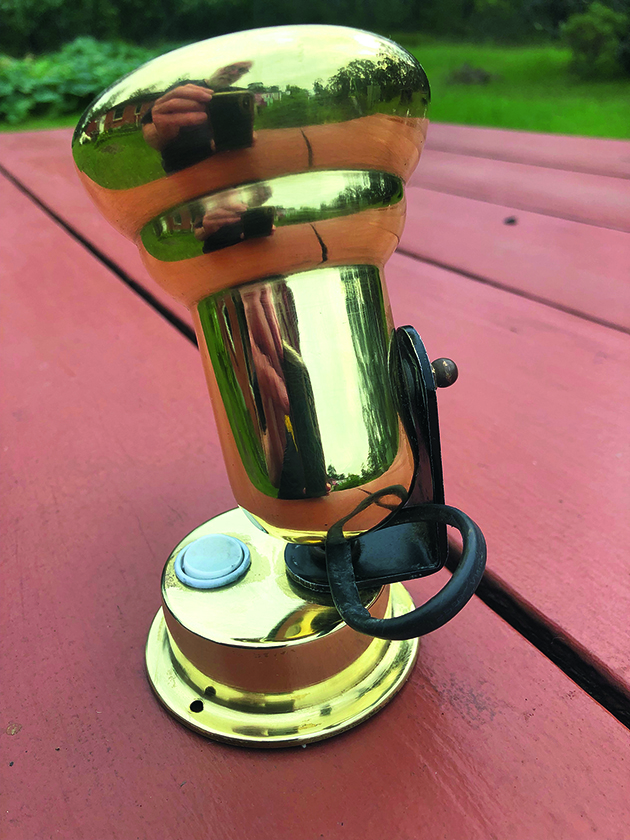
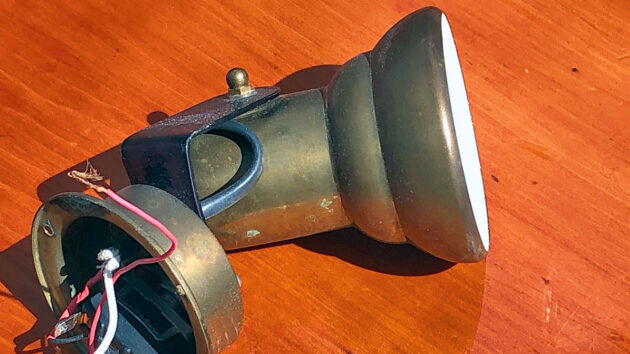
John Tylor brings some cast-off tarnished brass light fittings back to shiny life
A couple from our sailing club had just taken delivery of a new (to them) catamaran and could not wait to show it off to the members.
The boat was beautiful, but improvements were needed, including replacing the dull brass electric lamps distributed throughout the cabins.
Destined for the junk pile, they were basically in excellent condition, but the years in the sea air had tarnished them to an unattractive dull brown/grey.
Over time, the clear lacquer had broken down, allowing the salt air to do its worst. So they were just right for a winter project.
Easy, I thought, remove the clear coating, polish it up, spray on another coat of lacquer, and the brass will glow like new gold!

The mini-tool was slow but proved to be the best finishing combination to clean tarnished brass. Credit: John Tylor
Well, the job required a little more effort than I first thought.
I’d been doing a lot of brass restoration on a project at the Australian National Maritime Museum, where I work as a volunteer.
There, we use a chemical paint stripper to soften the old lacquer then scrape the residue off with a razor blade.
Unfortunately, that process didn’t work on these lamps.
The coating was very difficult to remove; paint stripper didn’t work and neither did acetone, which usually softens most coatings.
Carefully scraping with a razor blade only removed small amounts and risked marking the brass – this old lacquer was hard.
Very fine wet-and-dry paper was only partially successful, and I couldn’t resort to heat as it would have damaged the wiring and plastic parts.
I don’t have a bench grinder with a buffing wheel, so I bought a small battery-powered mini-grinder.
This came with a selection of grinding wheels and sanding discs, but the most successful combination was using a polishing wheel with a tub of multipurpose paste cleaner from the kitchen to just wear the stuff off.

John’s method to clean tarnished brass worked a treat! Credit: John Tylor
By adjusting the speed of the tool, this was just gritty enough to remove most of the stubborn residue.
Once the old lacquer had finally been removed – carefully to avoid damaging the plastic switch – I found that a well-worn green scouring pad worked well in removing the last of the residue without leaving deep scratches.
Finally, a polishing cloth and Brasso finished the job off, leaving a beautiful mirror shine.
The final job was to spray on a few coats of new lacquer.
Was it worth it? Yes, for the sense of achievement in restoring an otherwise serviceable light and seeing the beautiful shine.
It was a lot of effort but what else to do when the TV offered nothing and the weather was too bad to get to the boat?
Cleaning with acid and its uses onboard
Applying corrosive acid to magically clean or loosen a boat part sounds tempting - but caution is required, as Andy…
In-water hull cleaning: one sailor’s tips
Andy Pag takes the plunge to clean his boat’s dirty bottom while afloat
Cleaning a diesel tank: a practical guide
Richard Barnard braves the mess and overcomes key challenges for the satisfaction of a clean fuel tank, free from sediment…
Refilling a liquid-filled compass
With a half-empty liquid-filled steering compass and no obvious sign of a leak, Norman Eastwood decided it was time to…
Want to read more practical articles like How to clean tarnished brass?

A subscription to Practical Boat Owner magazine costs around 40% less than the cover price.
Print and digital editions are available through Magazines Direct – where you can also find the latest deals.
PBO is packed with information to help you get the most from boat ownership – whether sail or power.
-
-
-
- Take your DIY skills to the next level with trusted advice on boat maintenance and repairs
- Impartial in-depth gear reviews
- Practical cruising tips for making the most of your time afloat
-
-
Follow us on Facebook, Instagram, TikTok and Twitter


